How To Draw in Microsoft Word
Microsoft Word makes it easy to insert images and clipart, but did you know you can also draw in Word? Whether you're a budding artist or you need to mark up a work document, Word’s drawing features let you add custom visuals to supplement the text in your document. Word gives you the option to draw with lines and standard shapes, or pen tools for free-form drawing with a mouse or digital pen.
In this step-by-step guide, you will learn how to draw in Word using these two different options.
Using shapes
Using pen tools
How to draw in Word using shapes
Please note that these features require Microsoft 365, Office 2016, Office 2019, or Office 2021 on Windows. On a Mac, these features are available on Microsoft 365 and Office 2019 for Mac.
1. Use lines to draw on a Word document
Open your Word document. Make sure your cursor is near the area you would like to start your Word drawing.
Click the “Insert” ribbon toolbar located at the top, then select the down caret on the “Shapes” button to open shape options.
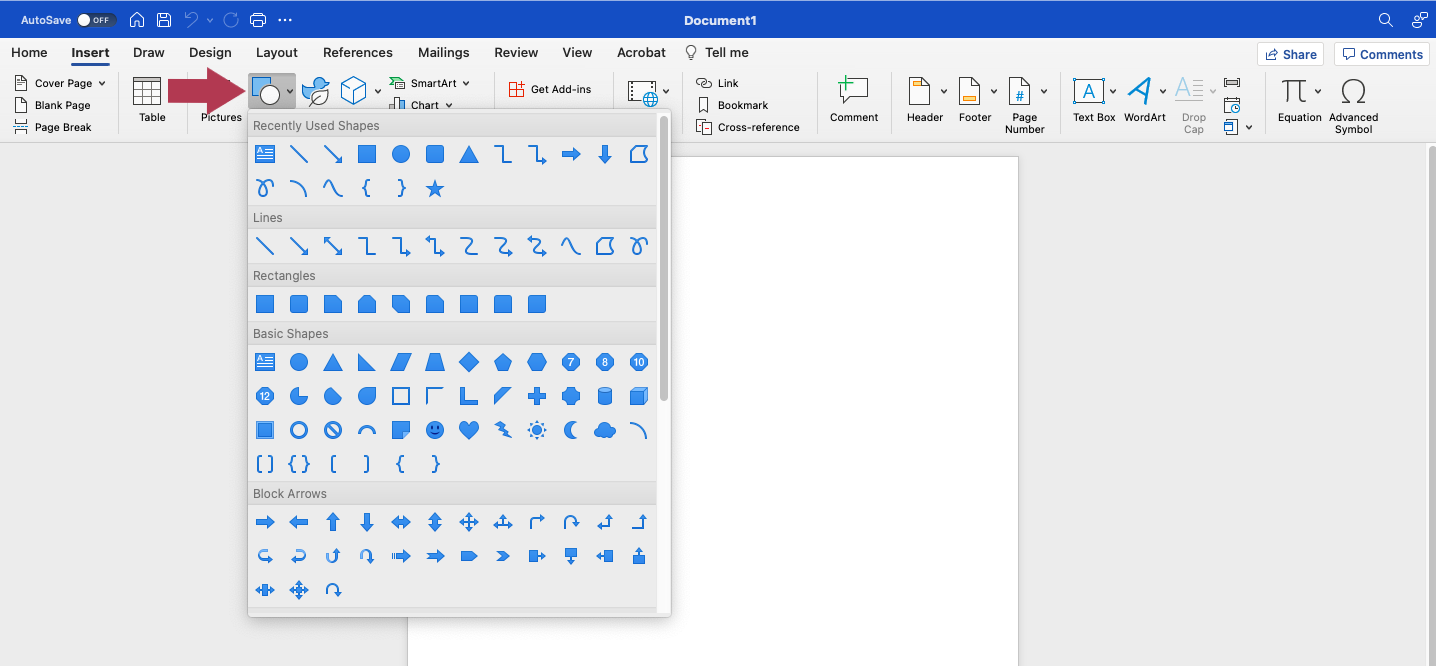
Click the “Insert” ribbon toolbar, then select the down caret on the “Shapes” button. Source: Author screenshot
Hover over the icons in the drop-down menu to reveal their labels. Then, from the “Lines” section of the “Shapes” drop-down menu, select either the second to last (Freeform Shape) icon or the last (Freeform Draw) icon.
On some versions of Word, these options may be called “Shape” and “Scribble.” The Freeform Shape option lets you create a custom shape by drawing with curved lines. The Freeform Draw or Scribble option allows you to draw freely within your Word doc.
Click the Word document to place either the freeform or scribble, and begin drawing.
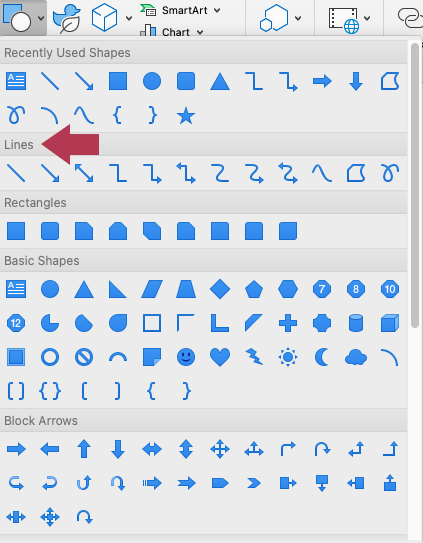
Select “Freeform” or “Scribble” from the “Lines” section of the “Shapes” menu. Source: Author screenshot
Once the shape is placed, locate the “Shape Format” bar for additional shape formatting options.

Navigate to the “Shape Format” bar for more shape options. Source: Author screenshot
2. Adjust shape and outline fill to customize drawing color
To change the fill color of a shape, click the “Shape Fill” button. Select no fill, a standard color, a theme color, or a custom color to fill in your Word drawing. You may also choose a gradient fill, texture fill, or a picture.
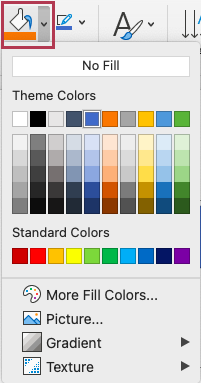
Use the “Shape Fill” panel to customize the color of drawings. Source: Author screenshot
3. Use shape effects to customize drawing appearance
Click the 3D box icon underneath the “Shape Effect” panel to apply dimension to your drawing. Select your drawing, and then click your desired shape effect to apply the effect.
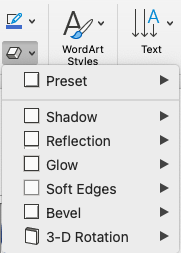
Use the “Shape Effect” panel to customize the look of your drawing. Source: Author screenshot
4. Adjust your drawing by editing points
Select the “Edit Shape” button, and click “Edit Points”. Use your cursor to manually adjust the placement of pixels on your drawing.

Select the “Edit Shape” button then click “Edit Points.” Source: Author screenshot
How to draw in Word using the pen tools
If you find drawing with shapes in Word difficult, try the pen tools to create art instead. The pen tools offer a variety of digital pens, highlighters, and pencils for illustrations such as document markups that require a more delicate brush stroke. The pen tools work especially well on a touchscreen device with your finger or a digital pen.
1. Click on the "Draw" ribbon toolbar
Select the "Draw" ribbon toolbar to access the pen tools.
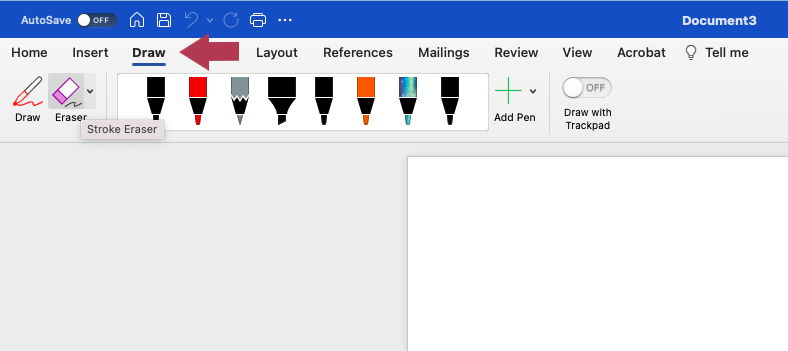
Select the “Draw” ribbon toolbar to access pen tools. Source: Author screenshot
2. Right-click any of the pen icons, then click "Modify Tool"
Right-click any of the pen icons, then click “Modify Tool” to modify pen tool settings.
Right-click the pen icon, then select “Modify Tool”. Source: Author screenshot
3. Change the pen tool options
Change the size, color, and effect of the pen tool by clicking any of the given options.
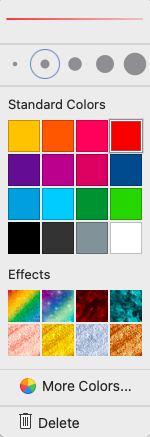
Change the size, color, and effect of the pen tool using the “Modify Tools” panel. Source: Author screenshot
4. Select the desired drawing tool
Click the green “+” icon to select the desired drawing tool. Pick from a pen, highlighter, or pencil tool.

Click the green “+” button to add a new drawing tool. Source: Author screenshot
Adjust your drawing using the eraser tool
Under the “Draw” ribbon toolbar, click the eraser tool. Select your desired eraser size from the drop-down menu, then drag the eraser over the drawing you would like to remove.

Select an eraser from the drop-down menu. Source: Author screenshot
How to draw your signature in Word
For some documents created in Word, it can be handy to add your signature. You can easily accomplish this with the pen tool of your choice. A digital pen or even your mouse can be used to draw a signature. On a tablet or other touchscreen device, you can also use your finger to write your signature.
Make Word docs more interesting with drawings
Following the above steps will add interesting and eye-catching drawings to your Word. Instead of only describing certain topics with text, you can now show readers with illustrations. On a touchscreen device, you can even do freeform drawings, and add signatures to Word docs that require them.
Now that you’ve learned how to draw in Word, further your expertise by learning about the rest of the Microsoft 265 suite or other document creation applications: