
How To Access Windows 10 BIOS
A basic input/output system (BIOS) is the first thing that turns on when you power up your device.
The BIOS initializes your computer’s hardware before engaging its hard drive operating system, acting as a middleman between operating systems and hardware by controlling data flow.
To change the way your computer boots up, you will need to access BIOS. In this article, you will learn how to do so. You’ll also learn the following:
What is BIOS?
Basic input/output system (BIOS) is on a chip on the motherboard of your computer and controls many settings (such as the boot order of your drives and preboot security options). In this way, it differs from your operating system (Windows), which is located on your computer’s hard drive.
BIOS controls various computer settings such as the drive’s boot order and preboot security options (Source)
Have you ever thought about what happens inside your computer when you press the “on” button? When you press your computer’s power button, BIOS engages the central processing unit to start the computer system. BIOS also controls the order in which devices are connected, and which external devices (such as your mouse) connect to your system.
Things to consider before accessing BIOS
BIOS is a critical component of your computer. Since each change could affect numerous aspects of your system’s configuration, changes to BIOS are typically made to solve a minor (yet critical) issue. For example, BIOS updates may fix a bug with an obscure piece of hardware or add support for a new central processor model.
BIOS updates will not necessarily make your computer faster. In fact, in some cases, altering BIOS can cause additional problems since it connects to so many of your computer’s systems. Therefore, be careful when accessing your BIOS. If your computer is working properly, you probably should not update your BIOS. You should only update BIOS if the new version contains an important improvement you need for your computer to function properly.
How to enter BIOS with function keys
You can access BIOS while your manufacturer’s screen is visible (before Windows begins to load). To do so, you will need to press a specific key that accesses BIOS. This is called a function key.
On many operating systems, the function key is F2. (You will know which key to press because during the bootup process, you will see a message that reads “Press [key] to access BIOS.”) Other buttons that may work in place of F2 are F1, F12, Enter, Delete, and Escape.
To access BIOS on Windows 10 using the function key method, complete the following steps:
Turn on your computer.
Press the function key (usually F2, but it depends on your PC) to access Setup.

The function key varies by PC manufacturer, but you can search online for ‘BIOS key’ plus the manufacturer’s name to find the correct function key (Source)
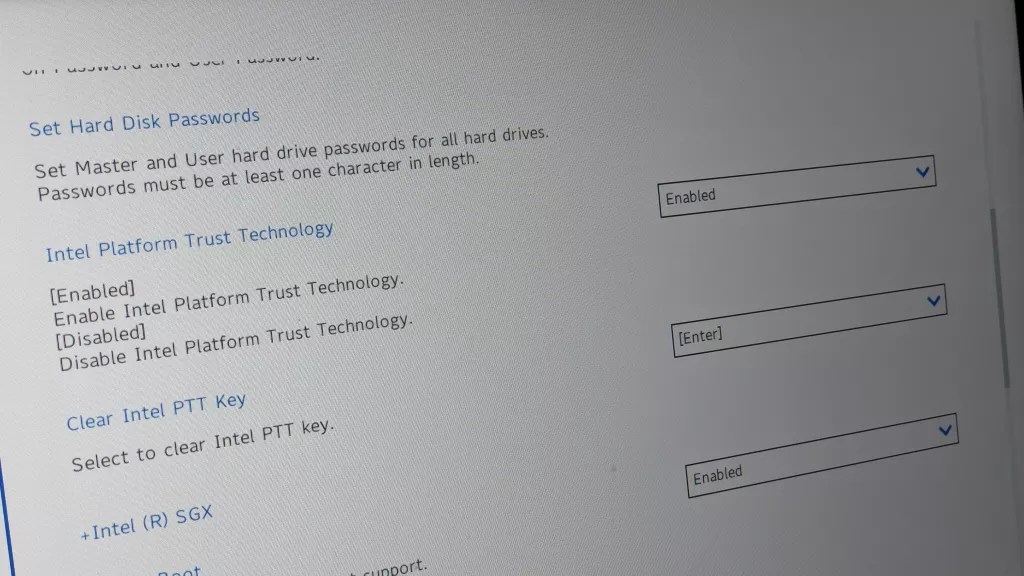
The Setup (BIOS) screen will appear.
If this method does not work, power down your computer and begin this process again. This time, hold down your function key (F2) while pressing the computer’s “on” button.
If the F2 function key does not let you enter the BIOS, you can try steps 1 through 3 again. During step 4, press F12. You can try this again with other possible function keys listed above (Enter, Delete, or Escape).
How to get into BIOS on Windows 10: Advanced Startup
Most newer computers boot up so quickly that there is no way to enter BIOS with function keys, as explained above. Instead, you will have to use the Advanced Startup to access BIOS.
Like the function key method, the Advanced Startup method for accessing BIOS is also straightforward. Follow these simple steps to access BIOS on Windows 10 in the Advanced Startup.
Click the Start menu and select “Settings.”

Open the Start menu and select Settings, indicated with a gear icon (Source)
Select “Update and Security.”

Select Update & Security, indicated with two circular arrows (Source)
Click “Recovery” from the menu located on the left.
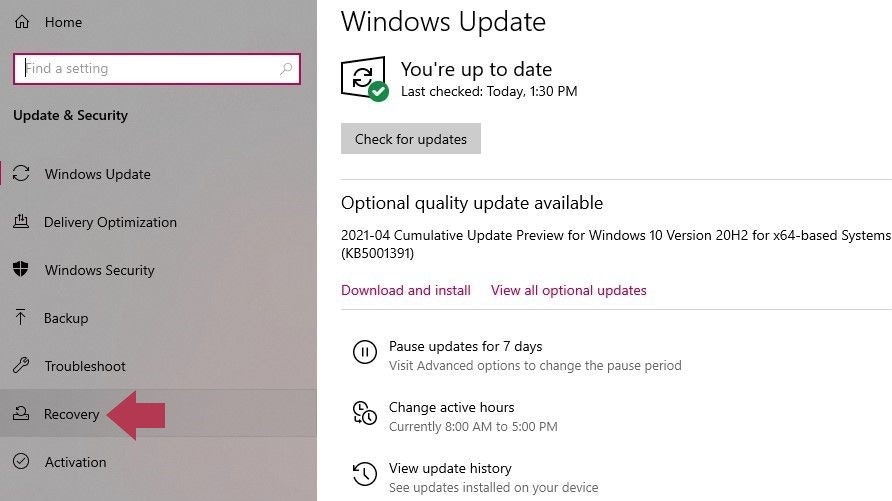
Locate and click Recovery in the left menu bar (Source)
Click the “Restart now” button located under the “Advanced startup” section.
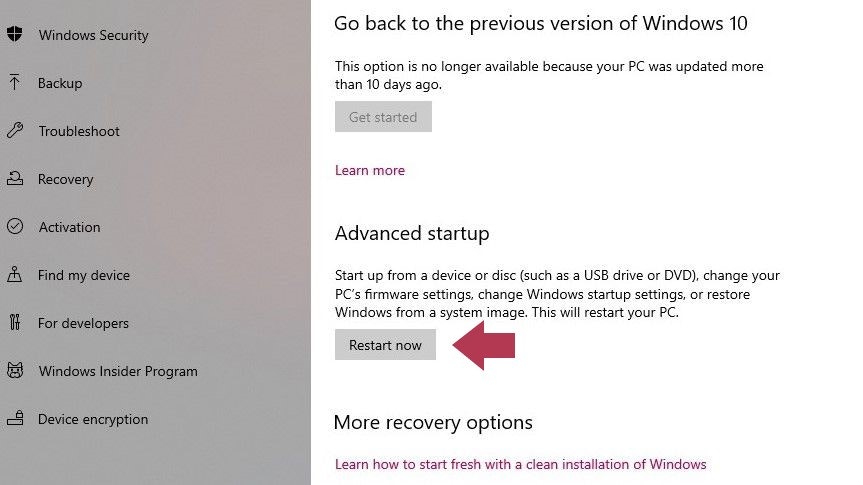
Locate and click the “Restart now” button under Advanced startup (Source)
Select “Troubleshoot” from the “Choose an option” menu.
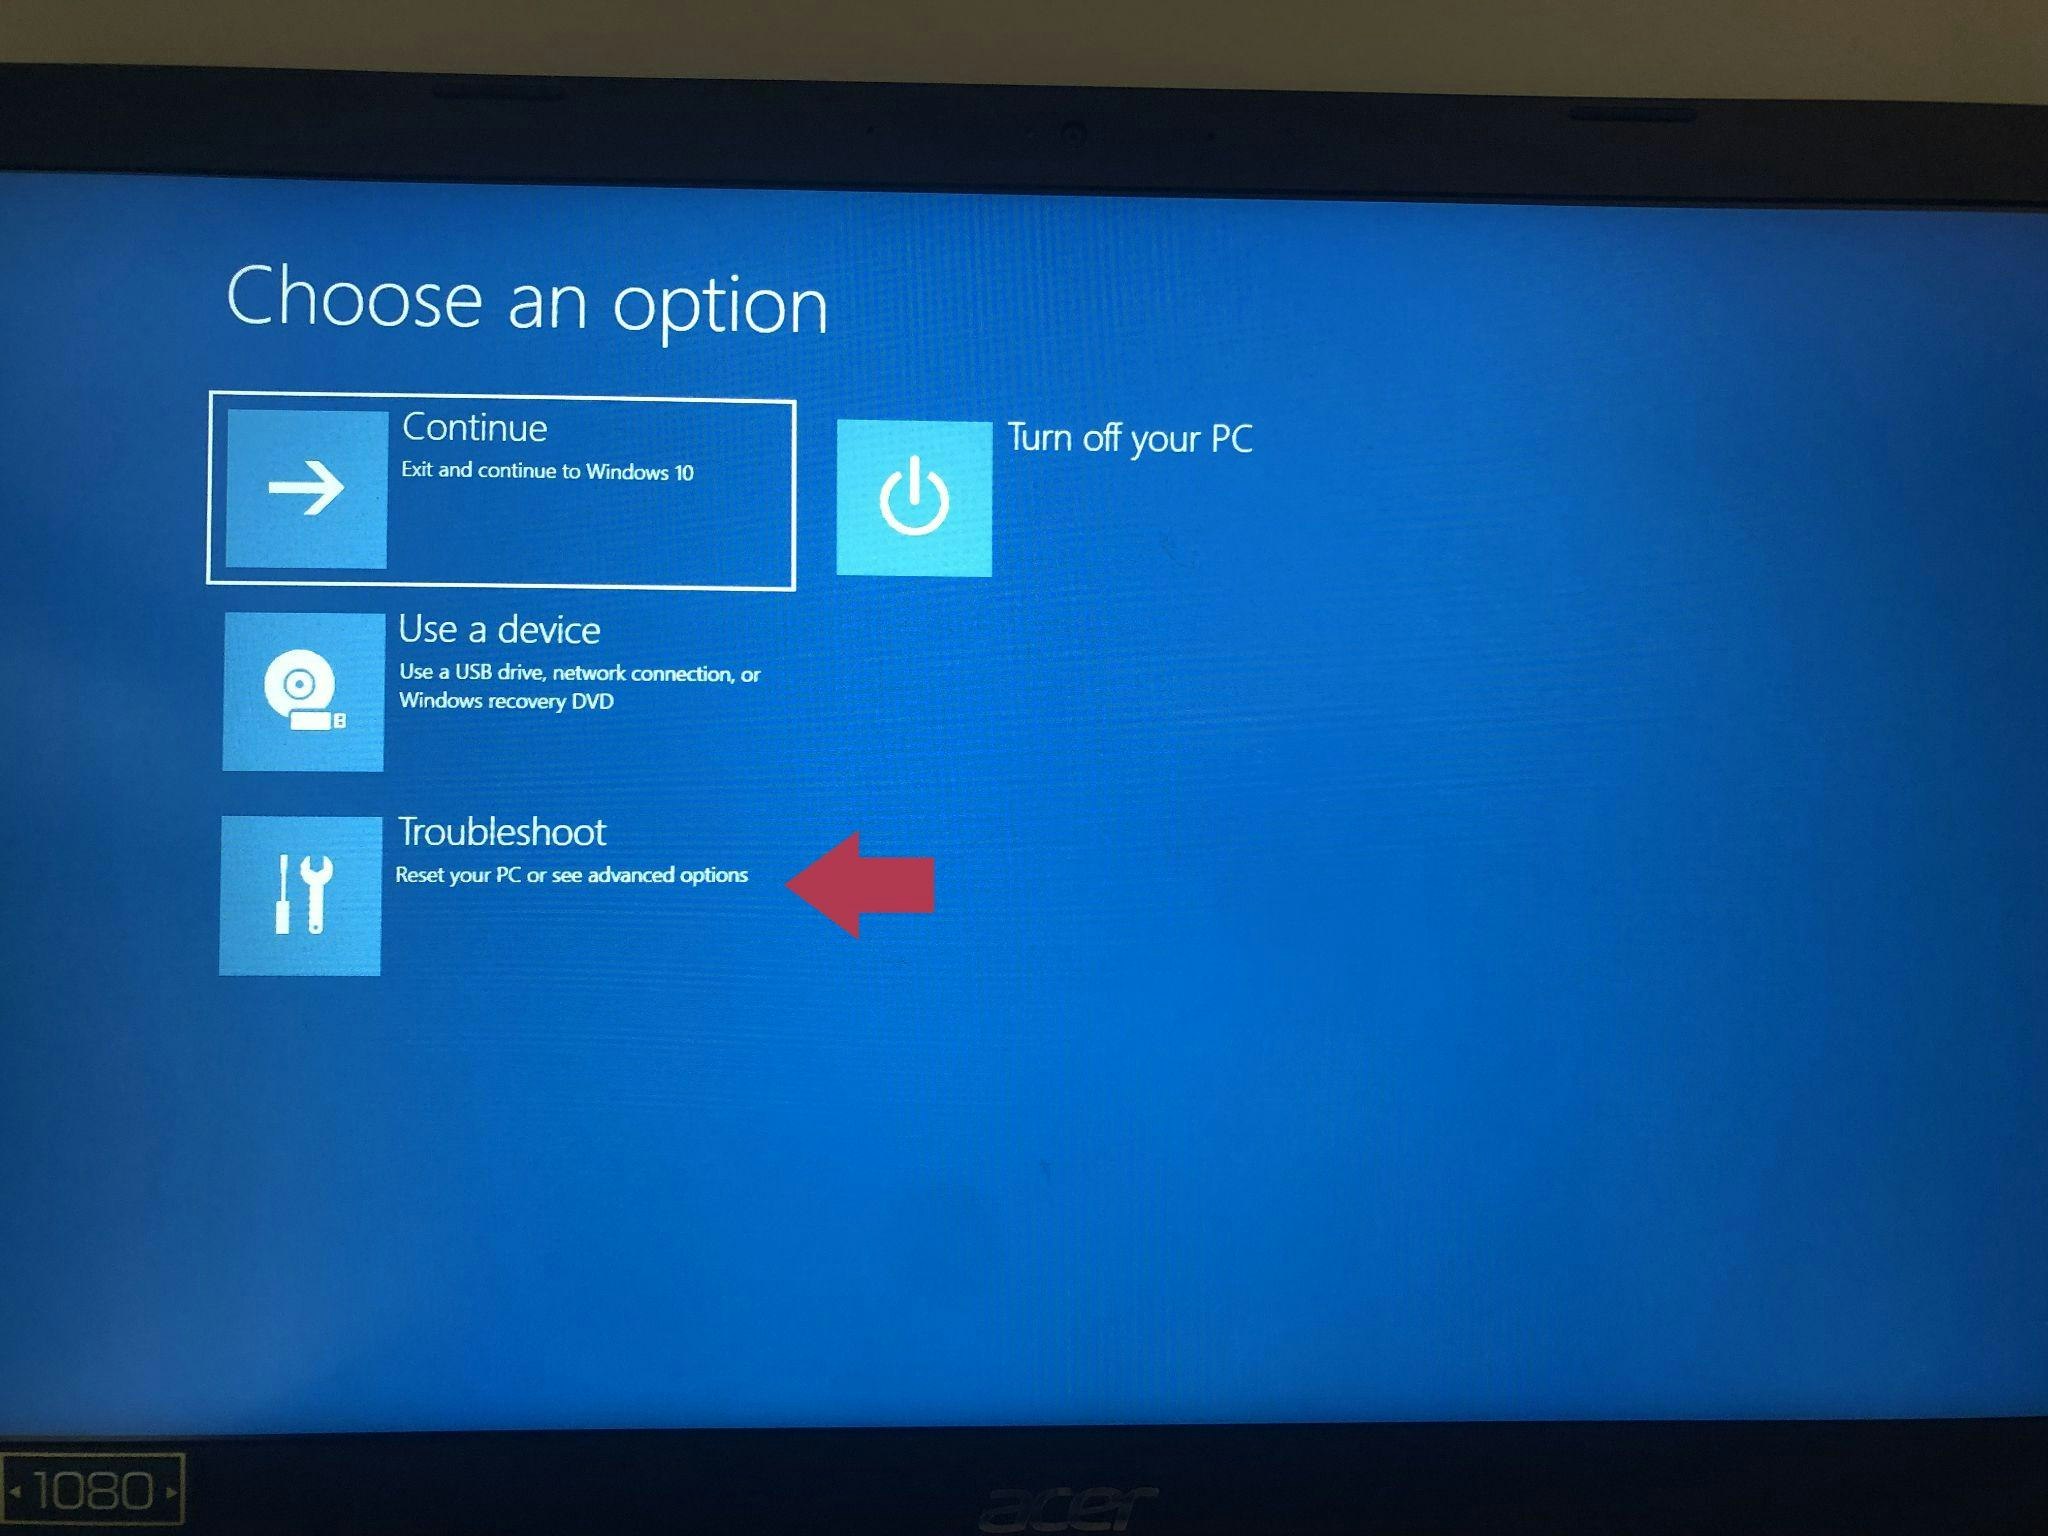
Select Troubleshoot, indicated by a screwdriver and wrench icon (Source: Personal PC screenshot)
Choose “Advanced options” from the “Troubleshoot” menu.
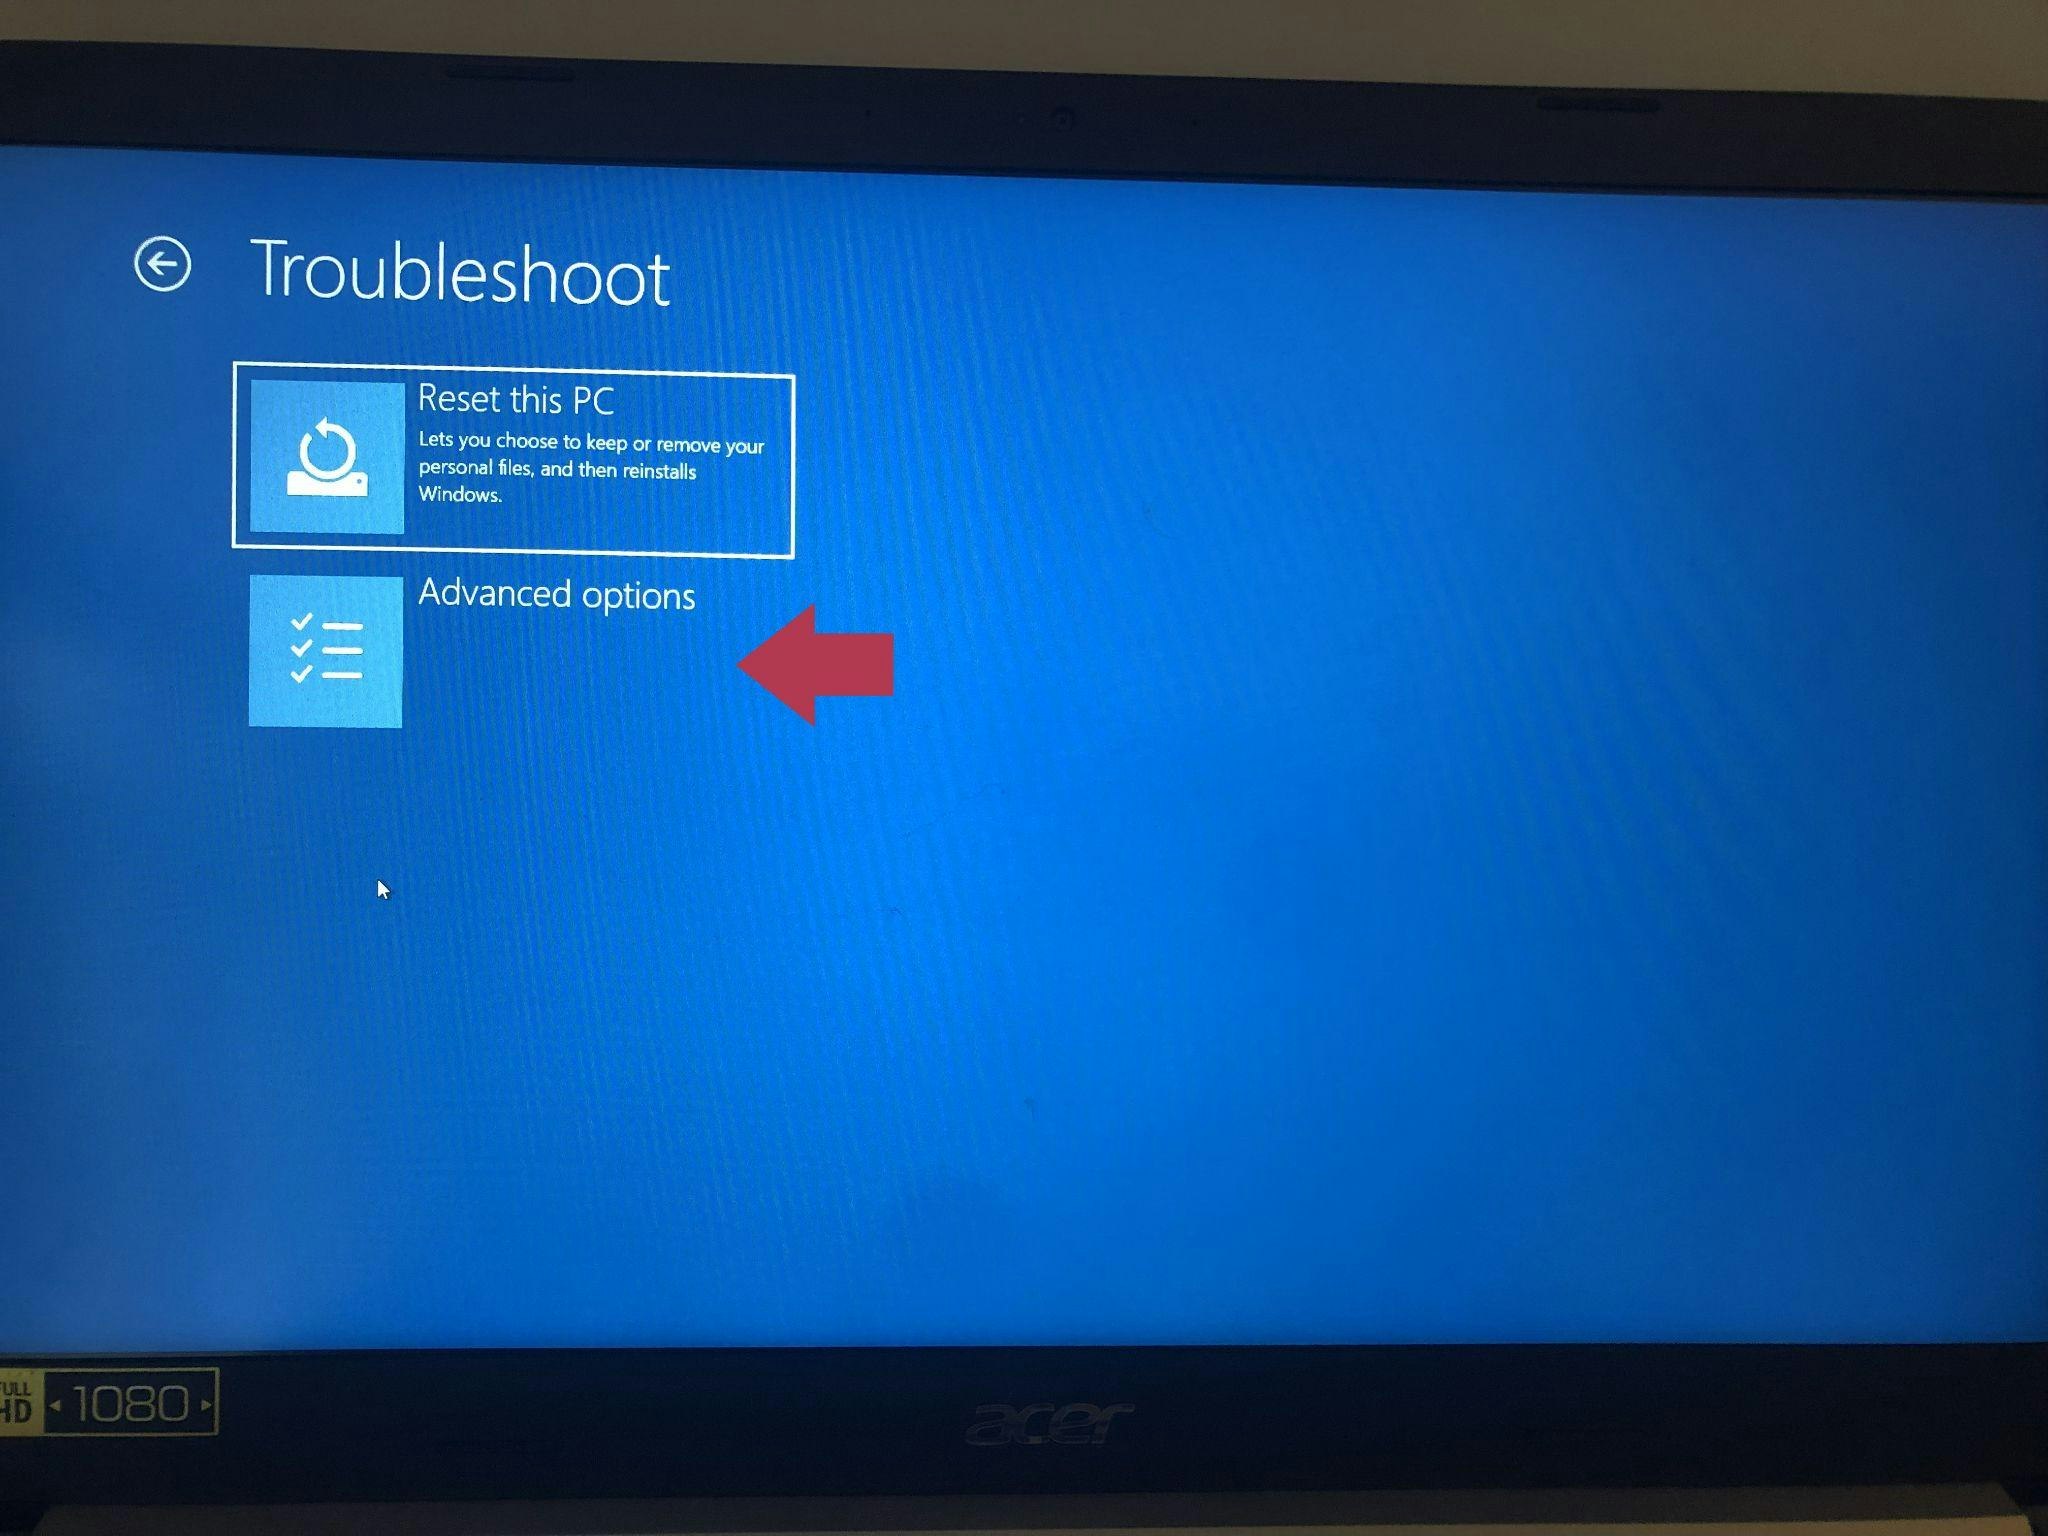
Select Advanced options from the Troubleshoot menu (Source: Personal PC screenshot)
Select “UEFI Firmware Settings” from the “Advanced options” menu.
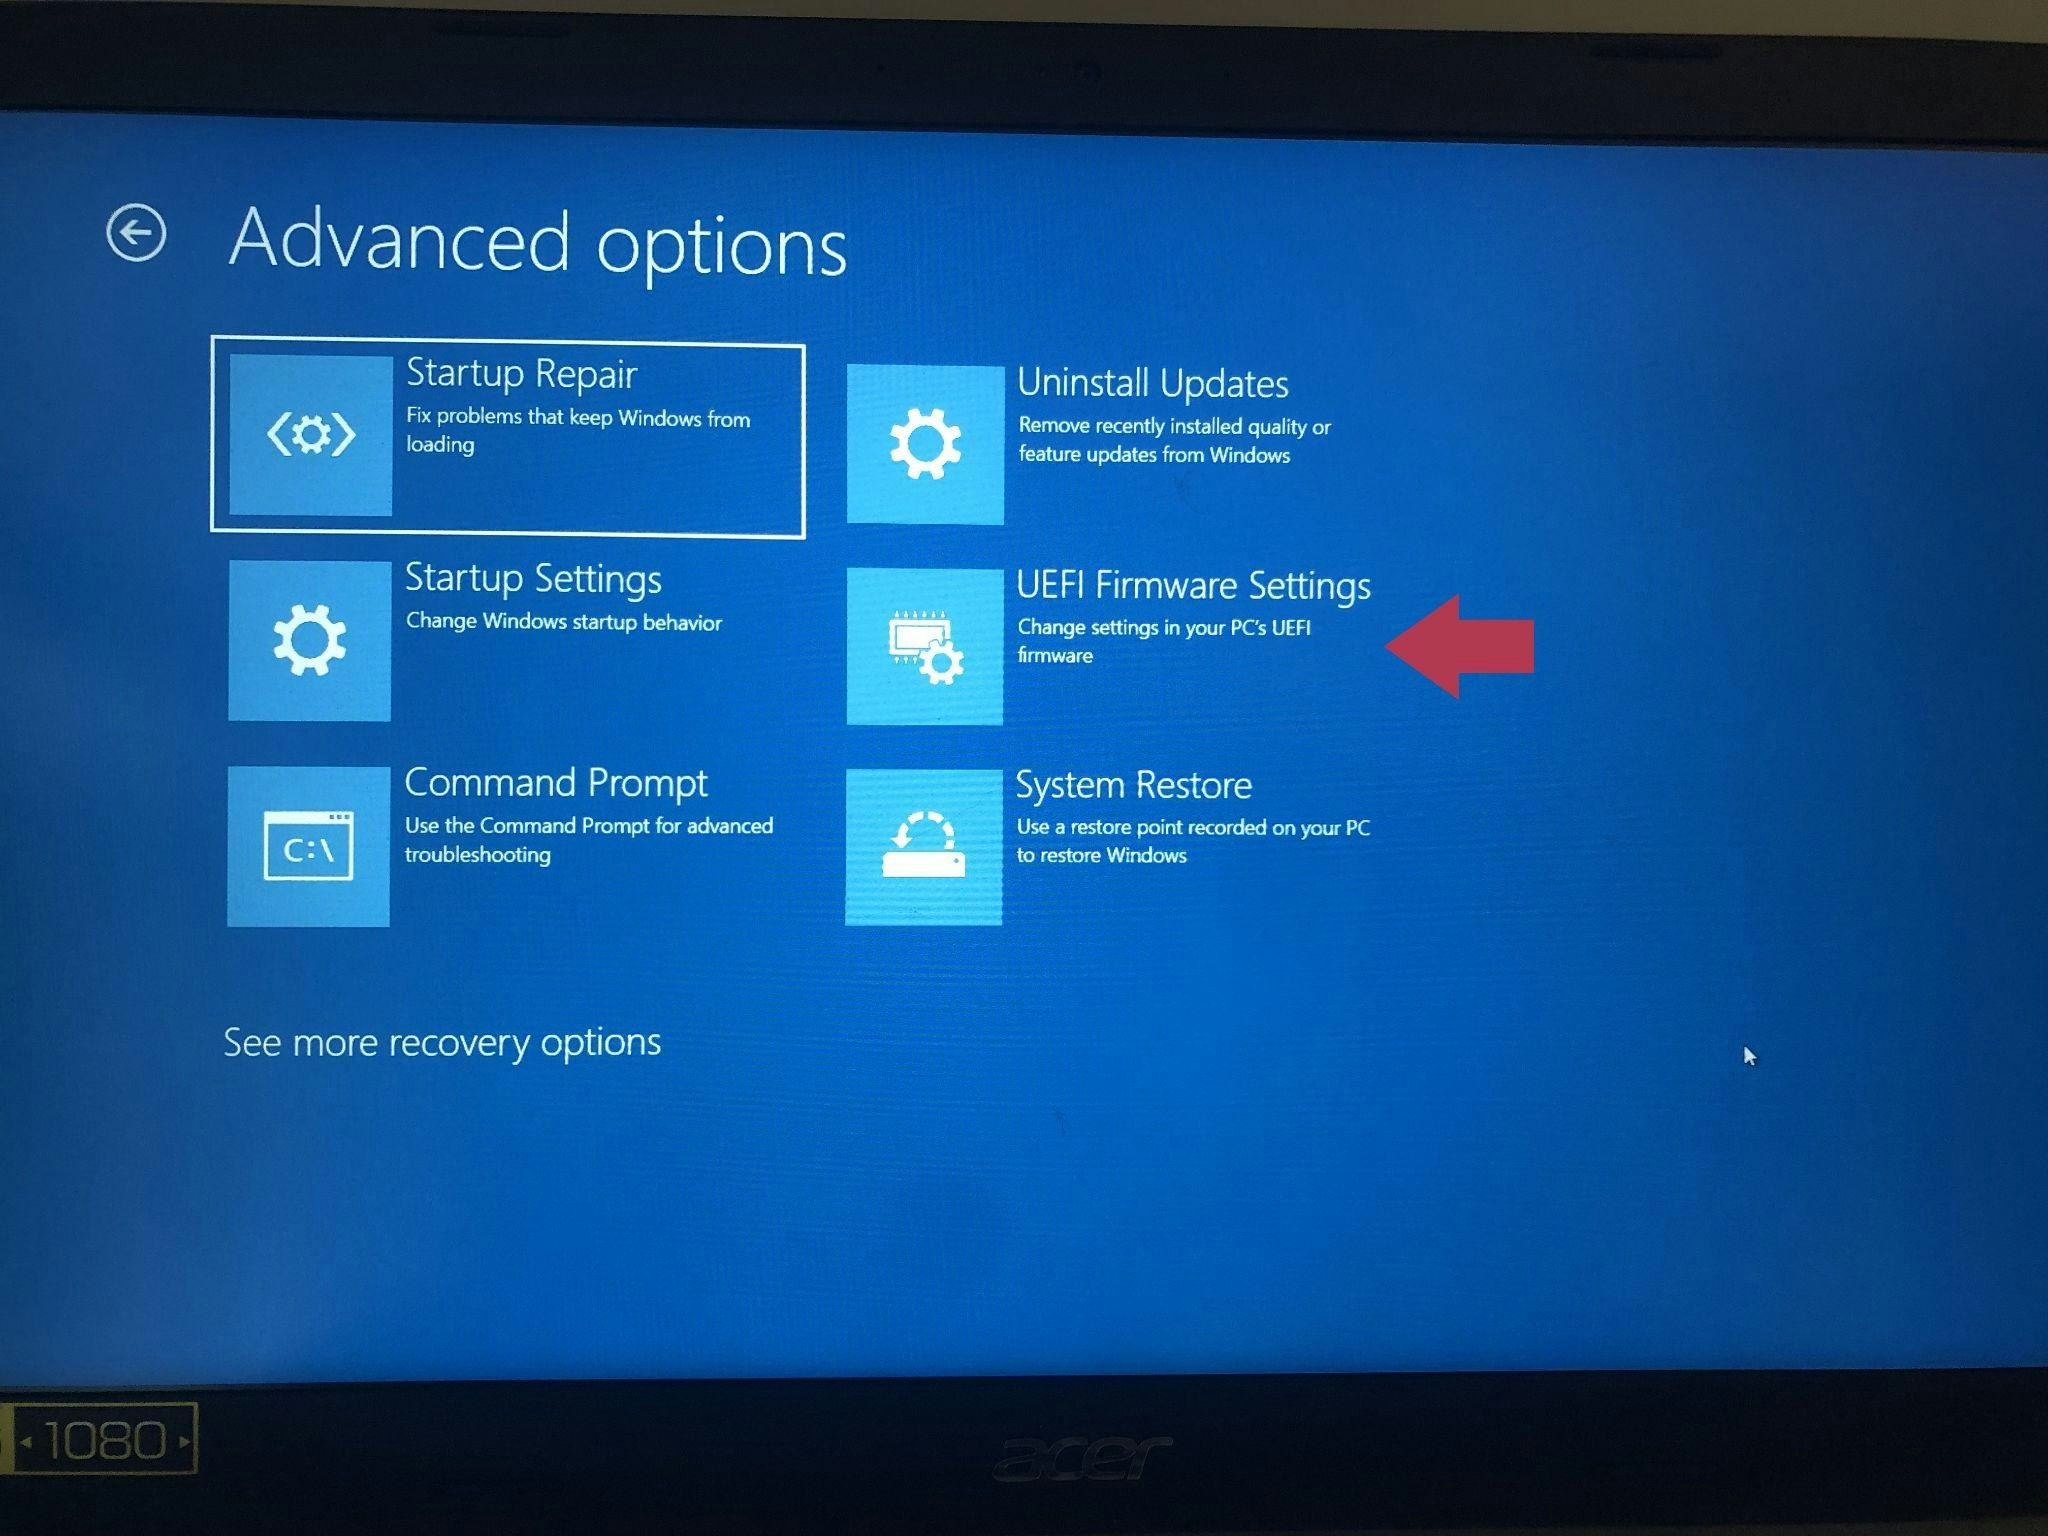
Click UEFI Firmware Settings in the Advanced options menu (Source: Personal PC screenshot)
Click “Restart” to restart the system and enter BIOS.
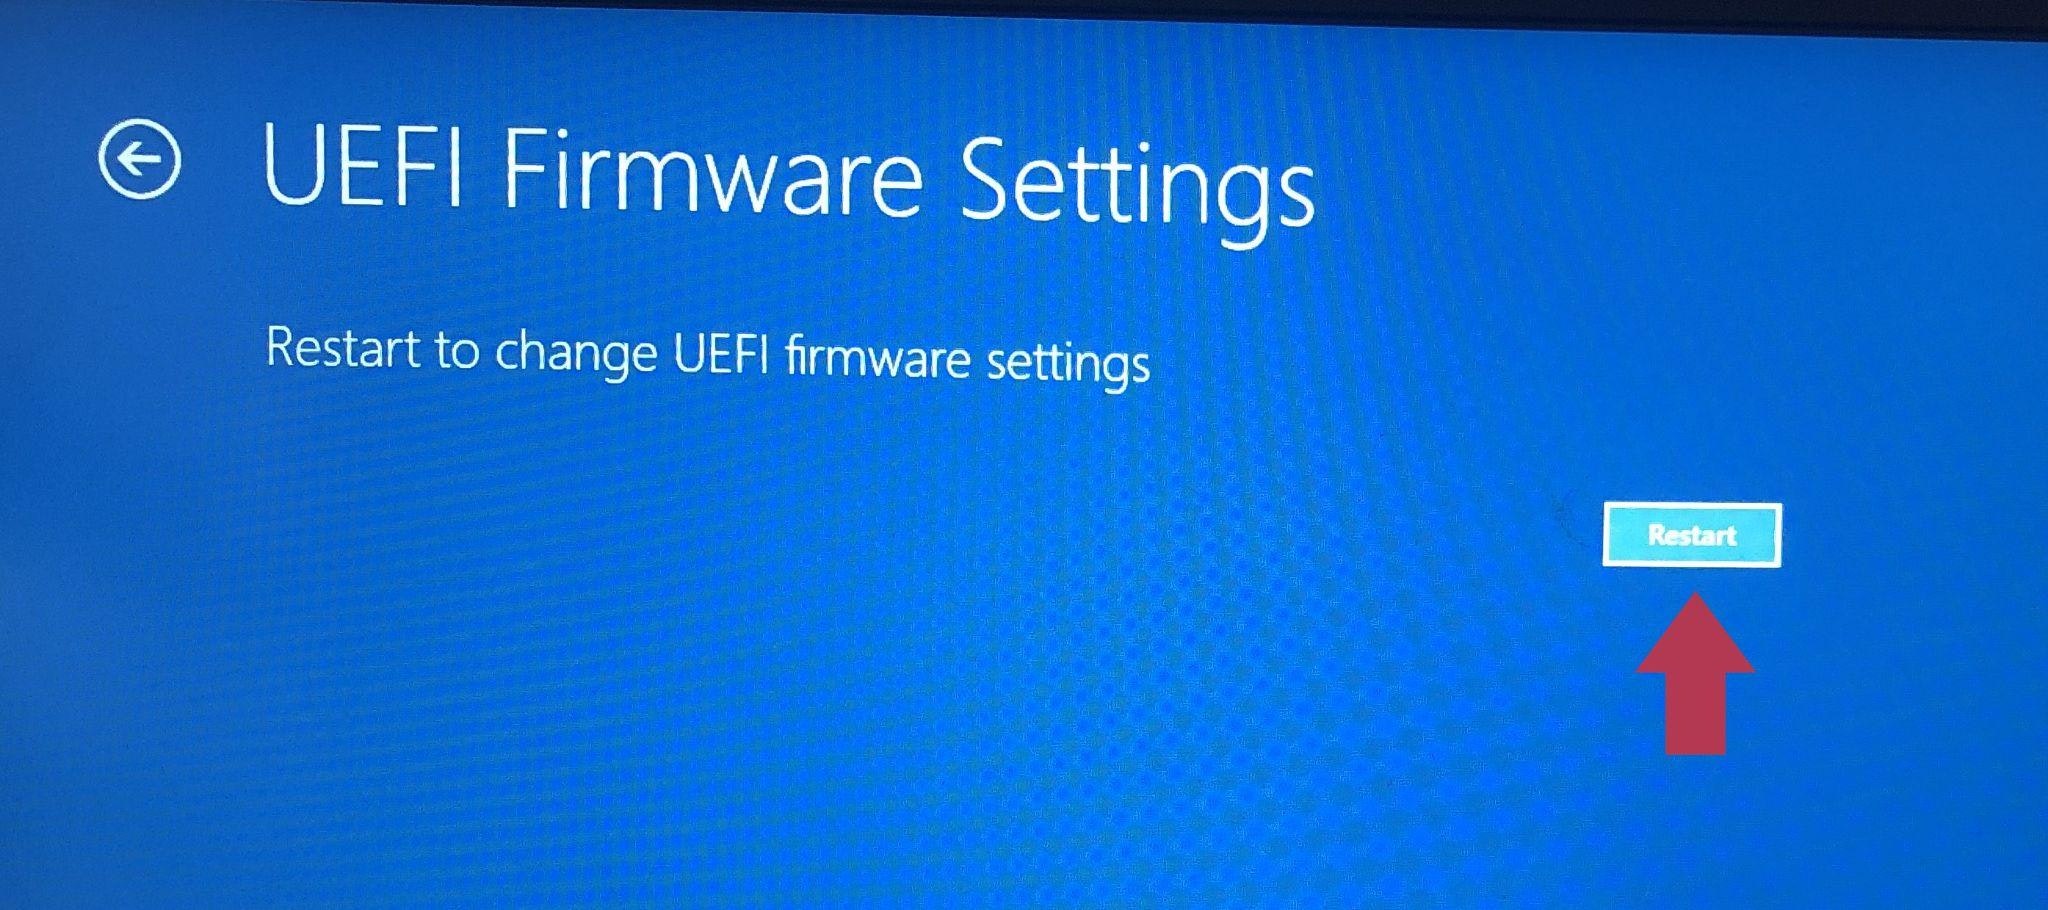
Click the Restart button to enter BIOS (Source: Personal PC screenshot)
Using the secure boot configuration
Through the process of accessing BIOS, you may discover that your computer runs on an Unified Extensible Firmware Interface (UEFI) instead of BIOS. If so, consider using a secure boot configuration. Secure boot configuration serves as a link between your operating system (Windows) and your computer’s hardware and helps your computer avoid risks such as virus infections and malware attacks. Learn more about secure boot configuration here.