How To Forward Gmail Automatically
Forwarding emails automatically can help you cut through your email account's digital clutter. Whether you're the head of a bustling startup or the leader of a midsize enterprise, mastering mail forwarding on Gmail can streamline your communications and make sure no important messages slip through the cracks.
Email forwarding is a silent partner in the battle to seize opportunities. It ensures that potential leads, crucial client updates, and even internal communications are shared with relevant parties, keeping everyone in the loop.
By setting up Gmail automatic forwarding, you fortify your business against common issues associated with delayed responses, information silos, and overlooked messages hidden within crowded inboxes.
What is email forwarding?
Email forwarding is the process where incoming emails are automatically sent from one email address to another. It’s like having an assistant who diligently ensures that every piece of mail gets to where it needs to go without you lifting a finger.
Forwarding Gmail messages automates the distribution of information. It's an essential move for ensuring continuity, delegation, and accountability within your business. Auto-forwarding Gmail messages keeps the wheels turning, even when you don’t actively manage your inbox.
How to set up Gmail forwarding automatically
Besides the standard setup, there are some clever strategies to customize Gmail forwarding so it suits your specific business needs. Let's break it down into simple, easy-to-follow steps:
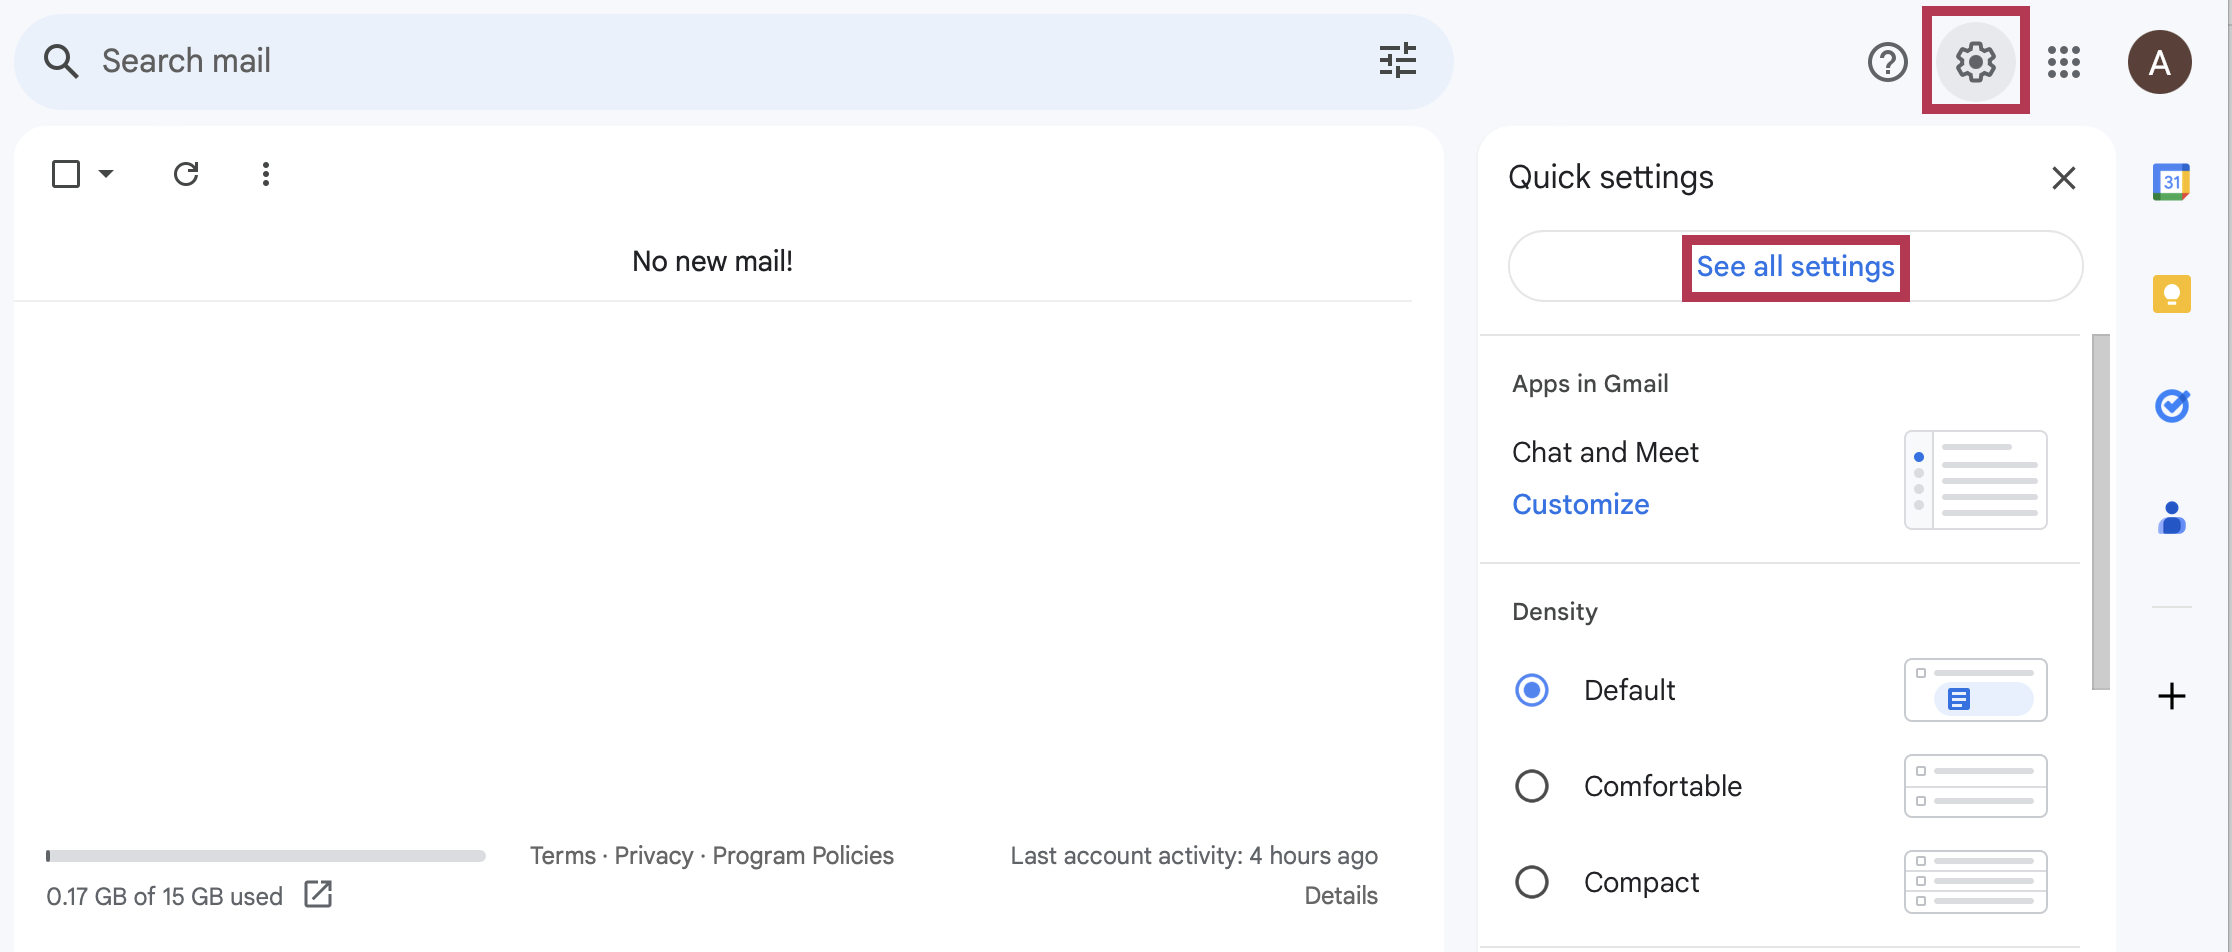
Step 1: Access your Gmail settings
Click the gear—aka the settings icon—in your Gmail account. This is where your account tools are located. Then click “See All Settings.”
Note: It’s not possible to auto-forward emails in the Gmail mobile app.

Screenshots provided by author.
Step 2: Navigate to the “Forwarding and POP/IMAP” tab
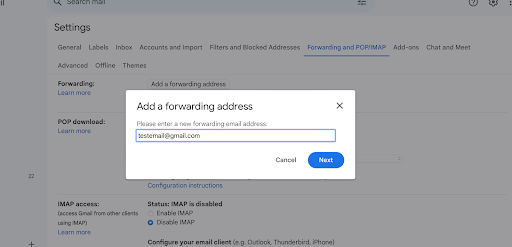
Once you’re in your Gmail account settings, click on the Forwarding and POP/IMAP tab, then click “Forwarding.” From the Forwarding section, click “Add a Forwarding Address.”

Screenshots provided by author.
Step 3: Add a forwarding address
When the tab opens, enter your forwarding address in the space marked “Forwarding Address.” Gmail will send a confirmation email to this forwarding address to ensure security and consent.

Screenshots provided by author.
Step 4: Confirm the forwarding address
After you (or your recipient) has verified the forwarding request, you can direct your emails to the forwarding addresses you specified by clicking “Next,” then “Proceed,” and then lastly, click “OK.”
Step 5: Choose what to do with forwarded emails
What should happen with future emails? You can choose the destination for future incoming messages.
After confirming your forwarding address in the confirmation email, return to your Gmail account settings page, and click your browser’s refresh button. Again, click the Forwarding and POP/IMAP tab. Navigate again to the Forwarding section and click “Forward a copy of incoming emails.” You can choose “Forward Only” or “*Keep a copy in Gmail.”
*Note: Google suggests choosing “Keep a copy in Gmail.”
Step 6: Save your changes
Once you've double-checked that your entries are correct, scroll to the bottom, and click “Save Changes.” This simple click ensures your forwarding rules are in effect.
How to forward Gmail messages to another account
The steps detailed above are all you need to forward messages to any account you choose. Follow them for each email address you need to forward messages to. Just remember to confirm the forwarding request (or request confirmation from the account owner).
How to forward Gmail messages with specific labels
For emails with varying levels of importance, you can set forwarding rules based on labels. Simply select a label and edit its settings to forward emails associated with that label to a designated address.
How to forward Gmail messages to a different account only if you don't reply
If you only want to forward email messages that you haven’t responded to, you need to create rules. For instance, say you want to forward less important messages to a personal email and review the messages later, this type of Gmail forwarding requires creating rules bolstered by filters.
In this case, you can create a filter that triggers forwarding when an email remains unanswered for a set period, which you can also choose.
How to create a Gmail forwarding address
Creating a forwarding address is the same as adding a forwarding address in your Gmail settings. Once the email address owner confirms the forward, that address is ready to receive your emails.
How to stop Gmail forwarding
If you decide to take a different approach and stop forwarding emails, simply revisit your Gmail settings. In the “Forwarding and POP/IMAP” section, you can disable any forwarding you set up previously.
How to troubleshoot Gmail forwarding problems
Technology, as easy as it makes some aspects of life, isn’t without the occasional hiccup. If you run into an issue, double-check the forwarding address and its confirmation status. Sometimes, a Gmail forwarding issue is as simple as a missed confirmation email.
On the other hand, you may also have inadvertently entered conflicting information in your forwarding settings. Make sure your filters don’t contradict your forwarding rules. If forwarding isn’t working correctly, review all filters and forwarding rules to rule out conflicting instructions. Delete any filters that override your instructions. Confirm that forwarding is again working correctly.
Common mistakes made or challenges faced when forwarding Gmail messages
Some of the most common mistakes business owners make when setting up automatic Gmail forwarding include:
Overlooking the confirmation step: Missing this step is like neglecting an important handshake to seal the deal. Without confirming the forwarding address, Gmail won't begin forwarding your emails, leading to a communication standstill. Obtaining confirmation is a security precaution, but it could result in missing critical communications.
Creating conflicting filters. Your filters are like your inbox’s traffic lights—they direct your emails based on the criteria you set up. If you create filters that contradict your forwarding rules, emails won’t reach their intended destinations. Missing important messages can cause confusion and potential missed opportunities.
Not regularly updating forwarding addresses: Business contacts change, and so can colleague and client contact information. Review your forwarding addresses regularly to ensure your account has the latest contacts and addresses. Neglecting to update these can result in emails being sent into the digital void or, worse, to an outdated contact. Or—even worse—the outdated contact information for a previous employee who now works for the competition.
Forgetting the “Save Changes” button: This is the final but most crucial step in your forwarding setup. Failing to click on the “Save Changes” button is like setting up dominoes but never nudging that first domino. The changes you thought you made won’t take effect, and your email workflow will stagnate.
Prepare your business for automatic Gmail forwarding
Now that you know how, you can automate your email workflow with Gmail forwarding. Like any good business strategy, automatic Gmail forwarding is about making technology work for you. So, set up email forwarding, and watch as your business communications become more streamlined than ever before.
Check out these other resources from Software Advice: