How To Wrap Text in PowerPoint
Wrapping text is a formatting function that keeps text within the margins of a page and avoids wasted space by “wrapping” the text to the next line. It is often seen in text boxes and around images in Microsoft Word.
Microsoft PowerPoint, however, lacks a one-click text wrapping function, but there are ways to work around this.
How to wrap text in a text box
The simplest way to wrap text in PowerPoint is to create a text box and then format your text in that box.
To wrap text in a text box on a PowerPoint slide, complete the following steps:
1. Create a blank slide.
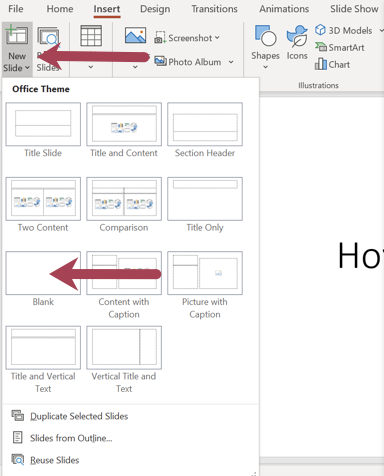
Create a blank slide by clicking Insert, New Slide, and select “Blank” in the menu that appears.
2. Click the Insert tab within the top menu, and then Text Box.

Click Insert and then Text Box.
3. To draw a text box, click your mouse in the upper left corner, hold the button down, and drag the box to the bottom right corner.
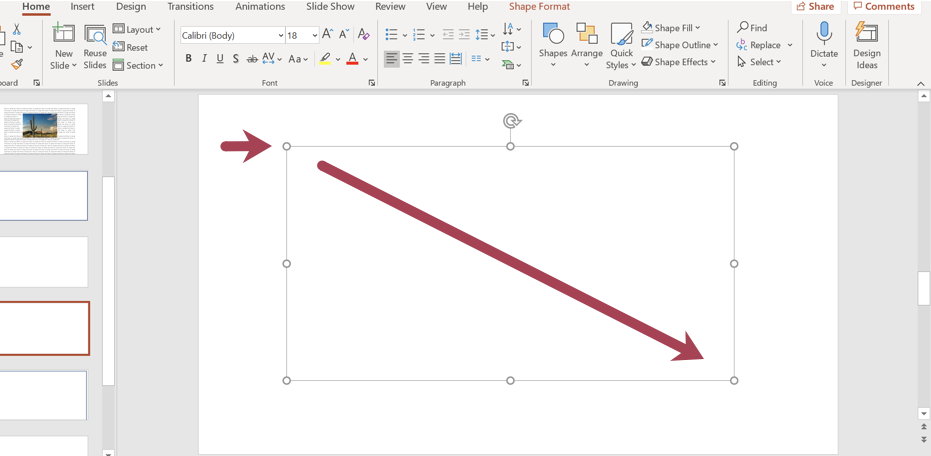
Click in the upper left corner, hold the mouse button down, and drag your box to the bottom right corner and release.
4. Enlarge or shrink your text box by selecting one of the corner circles and moving them in or out.
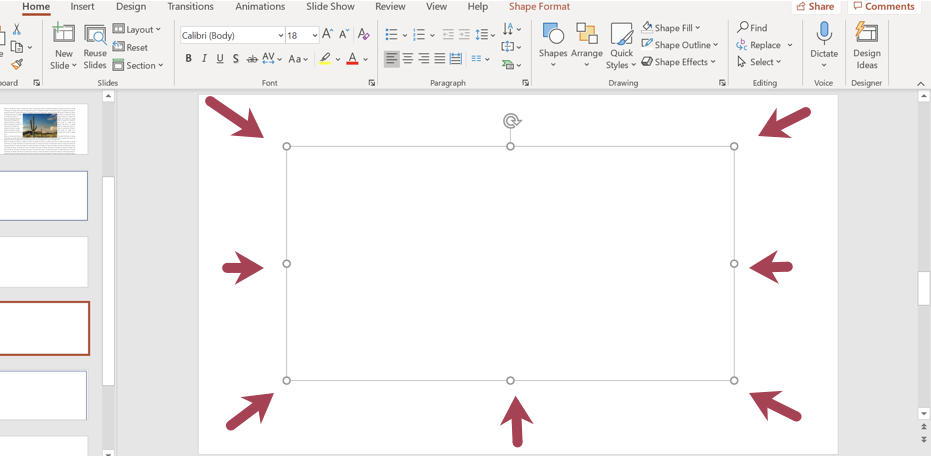
Change the size of your text box by selecting a corner circle and moving it in or out.
5. Enter your text in the text box.
6. Select all text by clicking anywhere in the box and pressing CTRL + A.
7. Click the Justify button on the main menu (an icon with four lines of equal length under the Home menu).
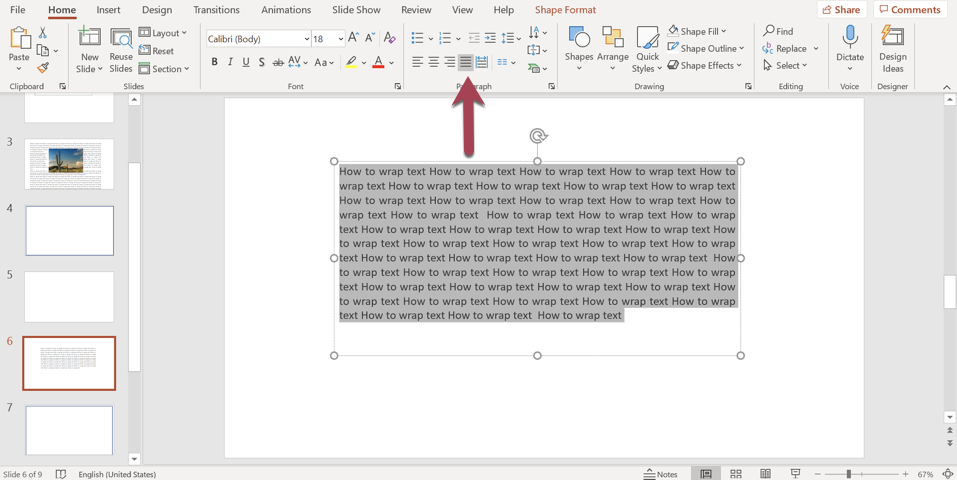
Click the Justify button.
8. Your text will now wrap to align with the text box perimeter.
How to manually wrap text around an image
One option is to create a text box, add an image, then manually move the text to surround the image. To manually wrap text around an image on a PowerPoint slide, follow the same steps through creating a text box, then:
1. From the top menu, press Insert and select Pictures from the resulting menu.
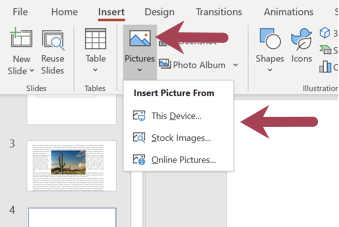
From the Insert menu, select Pictures and then choose an option to insert your photo.
2. Select your image insertion method of choice, add your file, then place it on your slide. Click the image and drag it to change the location; resize with the circles on each corner of the image.
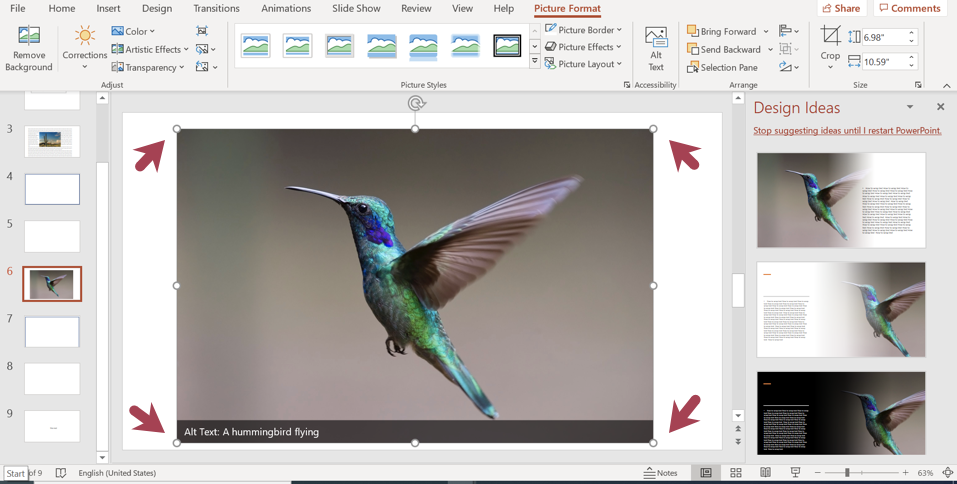
Drag the corner circles of the image box to resize it within the text box.
3. Manually move your text around the image to wrap it by placing your cursor next to the last word to the left of the image and pressing the spacebar until your text moves to the right of the image.
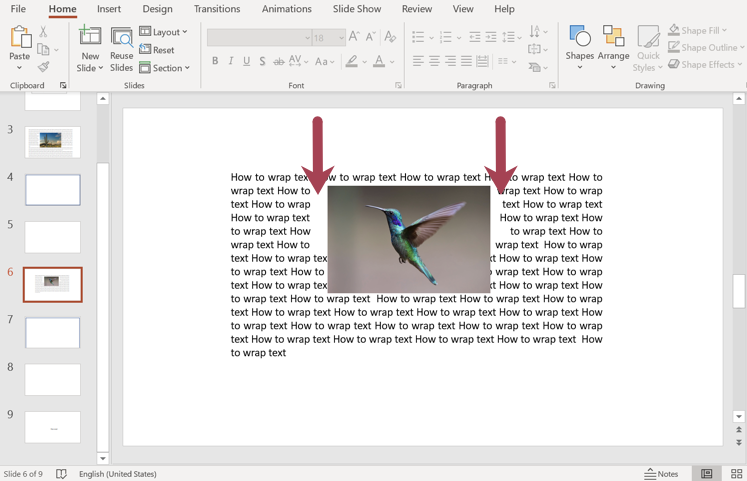
Move the text manually to surround the image.
How to create multiple text boxes around an image
Another way to mimic text wrapping is to create multiple text boxes and arrange them around an image.
For example, you can place an image in the middle of the slide and then create four text boxes, one on each side of the image. This will emulate wrapped text.
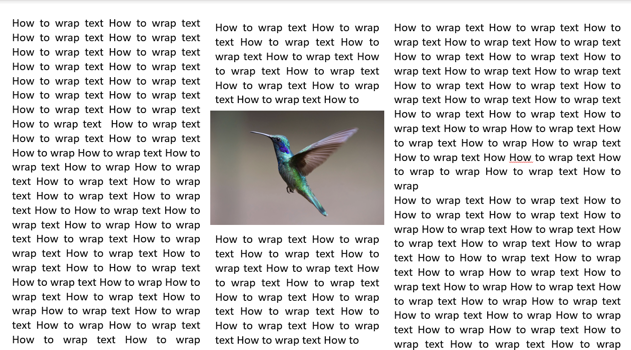
Creating multiple text boxes around an image is another way to mimic text wrapping in PowerPoint.
Follow these steps:
Add an image(s) to your slide using the steps outlined in the previous section.
Add a text box on one side of the image.
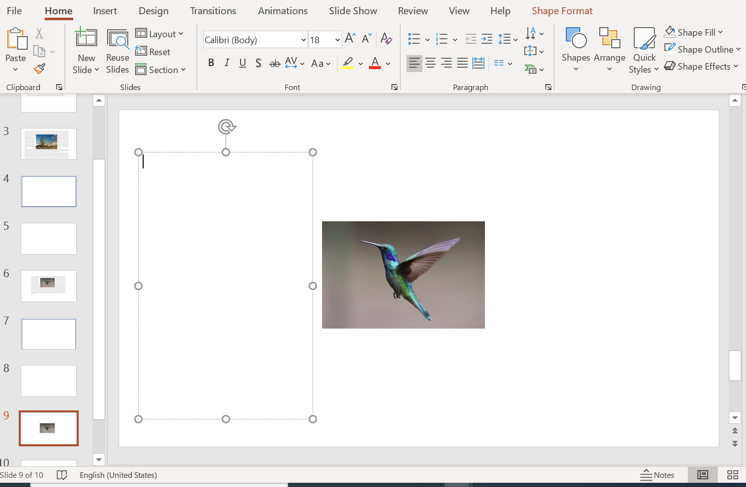
Add a text box on one side of your image.
Add text to your box, then press the justify button. Repeat this as many times as necessary until you have a text box on each side of your image.
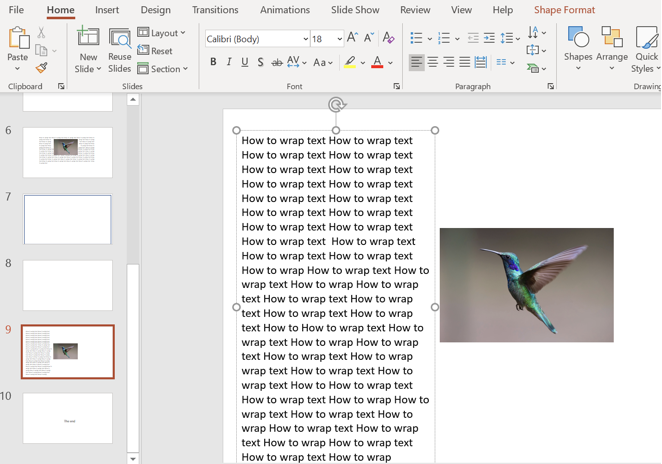
Continue adding text boxes until your image is surrounded.
Explore presentation software
While Microsoft PowerPoint has dominated the presentation software market since its development, it’s not the only option out there.
Explore other presentation software on Software Advice to find the right tool for your unique needs.